


How to Automatically Generate Icons and Splash Screens With the Ionic CLI
There are more than 24,000 Android devices and around 33 iOS devices.
Manually generating icons and splash screens to fit every need seems a hard task right?
Fear not my friends! There is a way to automate it!
Let's start by installing everything we need and creating a project:
npm install -g ionic cordova @ionic/cli-plugin-cordova
ionic start myApp blank
Ionic has a service that will generate the icons and splash screens for us, however, an Ionic account is required, you can create a free one there.
Once this is done, you can login in the terminal:
ionic login
Ionic's service can work with png or psd files. Two files are required: icon and splash.
Both of them are by default located in the resources folder:
![]()
In case you want to have one specific icon or splash screen for a platform, the icon and splash can be placed in the resources/<platform> directory.
The following command will generate the icons and splash screens:
ionic cordova resources
I'm working on Mac so the iOS platform is already present.
The icons and splash screens are only generated for every installed platforms, (on my computer) the Android folder will not be modified because this platform is not installed.
As usual, the Ionic team helps us and gives us a Photoshop template (there) to facilitate the splash screen creation.
![]()
I added the red square to show the area where the image should be placed to fit every devices.
Here's the result:

As for the icon, there are no bonus psd file, however, the Ionic icon itself already has the grid-lines to use.
Platform wise, Android will keep the icon as it is. On the other side, iOS will round the icon's corners. I added a red indicator to approximately show how the rounding is done, so keep the icon within this area.
Density and Conventions
That's what Ionic is doing, in case you didn't know Ionic uses Cordova to build HTML5 mobile web apps and takes advantage of many years of iterations to reach perfection.
The icons and splash screens will be generated in different versions, from a high quality image with a high dpi to a low quality image that has a low dpi.
If you are not familiar with the dpi measure or "pixel density", the higher the dpi, the more information an image possesses.
Here is an example:
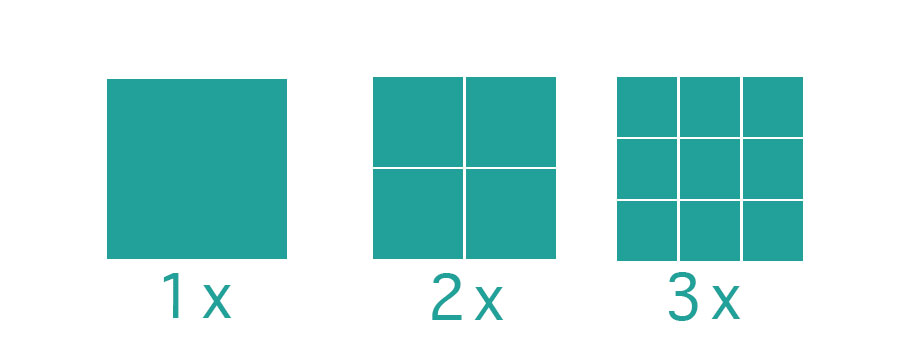
From left (low dpi = less information) to right (higher dpi = more information).
A traditional example is Youtube.
Some videos have very bad quality and the images are "pixelated". It's generally followed by the classical comment:
Two folders are created in the resources/
- icon
- splash
The two main platforms iOS and Android have their own naming conventions, but the principle is the same.
The Android density is as follow:
- ldpi (low)
- mdpi (medium)
- hdpi (high)
- xhdpi (extra-high)
- xxhdpi (extra-extra-high)
- xxxhdpi (extra-extra-extra-high)
Using the drawable-<densityLevel>-icon.png convention, the filenames are as follow: ![]() The naming convention for the splash screen is quite similar:
The naming convention for the splash screen is quite similar:
- For the landscape mode: drawable-land-<densityLevel>-screen.png
- For the portrait mode: drawable-port-<densityLevel>-screen.png
Here is the iOS convention:
![]()
Yep all those sizes... that's a lot.
![]()
It's a mixed up of size, multiplier, device name and orientation.
It's great that we don't do this by hand 👍.
Taking a step back, we can ask ourself:
Why are we generating lower quality images?
Many reasons:
- Performance: It's faster to load small images
- Storage: Smaller images equals smaller files
- Our own limitations: Very few people can see the difference on smaller screens
Let's now have a look at how things are working under the hood!
The config.xml File
Starting with the Android configuration:
 <platform name="android">
        <icon src="resources/android/icon/drawable-ldpi-icon.png" density="ldpi"/>
        <icon src="resources/android/icon/drawable-mdpi-icon.png" density="mdpi"/>
        .
        .
        .
        <splash src="resources/android/splash/drawable-land-xxhdpi-screen.png"
                density="land-xxhdpi"/>
        <splash src="resources/android/splash/drawable-land-xxxhdpi-screen.png"
                density="land-xxxhdpi"/>
        .
        .
        .
        <splash src="resources/android/splash/drawable-port-ldpi-screen.png"
                density="port-ldpi"/>
        <splash src="resources/android/splash/drawable-port-mdpi-screen.png"
                density="port-mdpi"/>
        .
        .
        .
</platform>
Two useful attributes here:
- src: Relative path where the icon or splash is located
- density: For which density level the icon should be used
For more information, the Cordova documentation is there.
On iOS:
 <platform name="ios">
        <icon src="resources/ios/icon/icon.png" width="57" height="57"/>
        <icon src="resources/ios/icon/[email protected]" width="114" height="114"/>
        <icon src="resources/ios/icon/icon-40.png" width="40" height="40"/>
        .
        .
        .
        <splash src="resources/ios/splash/Default-568h@2x~iphone.png"
                width="640" height="1136"/>
        <splash src="resources/ios/splash/Default-667h.png"
                width="750" height="1334"/>
        <splash src="resources/ios/splash/Default-736h.png"
                width="1242" height="2208"/>
        <splash src="resources/ios/splash/Default-Landscape-736h.png"
                width="2208" height="1242"/>
        .
        .
        .
</platform>
The density attribute can be used, but this time it’s optional.
The src attribute is still present, it’s coupled with width and height to display the right icon at the right place.
So, is that all?
One more thing.
iOS is very bad with transparency, here is an example:
A black background is created and the icon is floating inside, that sucks…
For this platform it’s better to use an image with a background:
Conclusion
Generating icons and splash screens is easy: it’s just one command.
However, it comes with some extra tasks that are outside of Ionic’s control. The images will be transformed by each platforms and the end result might surprise you.
If it does, make sure that you are using:
- The right image type
- The right position for the image
- A good image quality and size(1024 x 1024 for icons and 2208 x 2208 for splash screens)
- A background for iOS