


Using React and MobX in an Ionic application
We have seen quite a lot of things in the previous Ionic React Redux tutorial.
We used axios to access the Marvel Comics API and managed the Redux Store while linking its state to the React Component's props through the mapStateToProps mechanism.
In this one, we will do the exact opposite in term of complexity and build a counter app with a simpler Store from the MobX library. We will first create an autorun driven application then an annotations oriented one.
As usual for every Ionic React tutorial, you will have to go to the configuration tutorial first.
Extra configuration step
Now that we have a working Ionic React application, we can install the MobX related libraries:
npm i -S @babel/core @babel/plugin-proposal-class-properties
  @babel/plugin-proposal-decorators @babel/preset-react
  babel-core babel-preset-react mobx mobx-react
That's quite a lot right?
In details:
- mobx: This is the core MobX library
- mobx-react: This library has annotations for the second part of the tutorial
- @babel/plugin-proposal-class-properties, @babel/plugin-proposal-decorators: Will allow us to use annotations
- @babel/preset-react @babel/core babel-core babel-preset-react: The react preset from the previous tutorials didn't fit here so we need those ones
I had some issues because MobX needed the version 7 of babel-core so in case you have them too, here is the package.json deps:
"dependencies": {
    "@angular/common": "~6.1.1",
    "@angular/core": "~6.1.1",
    "@angular/forms": "~6.1.1",
    "@angular/http": "~6.1.1",
    "@angular/platform-browser": "~6.1.1",
    "@angular/platform-browser-dynamic": "~6.1.1",
    "@angular/router": "~6.1.1",
    "@babel/core": "^7.1.2",
    "@babel/plugin-proposal-class-properties": "^7.1.0",
    "@babel/plugin-proposal-decorators": "^7.1.2",
    "@babel/preset-react": "^7.0.0",
    "@ionic-native/core": "5.0.0-beta.14",
    "@ionic-native/splash-screen": "5.0.0-beta.14",
    "@ionic-native/status-bar": "5.0.0-beta.14",
    "@ionic/angular": "^4.0.0-beta.0",
    "angular-ionic-cli-builders": "^2.1.4",
    "axios": "^0.18.0",
    "babel-core": "^7.0.0-0",
    "babel-loader": "^7.1.5",
    "babel-preset-react": "^6.24.1",
    "core-js": "^2.5.3",
    "mobx": "^5.5.0",
    "mobx-react": "^5.2.8",
    "react": "^16.4.2",
    "react-dom": "^16.4.2",
    "rxjs": "6.2.2",
    "zone.js": "^0.8.26"
  },
  "devDependencies": {
    "@angular-devkit/architect": "~0.7.2",
    "@angular-devkit/build-angular": "~0.7.2",
    "@angular-devkit/core": "~0.7.2",
    "@angular-devkit/schematics": "~0.7.2",
    "@angular/cli": "~6.1.1",
    "@angular/compiler": "~6.1.1",
    "@angular/compiler-cli": "~6.1.1",
    "@angular/language-service": "~6.1.1",
    "@ionic/ng-toolkit": "^1.0.0",
    "@ionic/schematics-angular": "^1.0.0",
    "@types/jasmine": "~2.8.6",
    "@types/jasminewd2": "~2.0.3",
    "@types/node": "~10.7.1",
    "codelyzer": "~4.4.2",
    "jasmine-core": "~2.99.1",
    "jasmine-spec-reporter": "~4.2.1",
    "karma": "~3.0.0",
    "karma-chrome-launcher": "~2.2.0",
    "karma-coverage-istanbul-reporter": "~2.0.0",
    "karma-jasmine": "~1.1.1",
    "karma-jasmine-html-reporter": "^0.2.2",
    "protractor": "~5.4.0",
    "ts-node": "~7.0.0",
    "tslint": "~5.11.0",
    "typescript": "~2.7.2"
  },
Now that everything is installed, we can update the rules of the extra-webpack.config.js file:
const reactRule = [{
  test: /\.jsx$/,
  loader: "babel-loader",
  options: {
    presets: ['@babel/react'],
    plugins: [
      [
        "@babel/plugin-proposal-decorators",
        {
          "legacy": true
        }
      ],
      [
        "@babel/plugin-proposal-class-properties",
        {
          "loose": true
        }
      ],
    ]
  }
}];
We have a new preset, and some plugins configured allowing us to use the MobX annotations.
The Autorun
Now we can have some fun.
We start in the main.jsx file:
import React, { Component } from "react";
import ReactDOM from "react-dom";
import HomeComponent from "./app/HomeComponent.jsx";

ReactDOM.render(
    <HomeComponent />
  , document.getElementById("root")
);
We just render the React HomeComponent.
This component starts as follow:
import React, {Component} from 'react';

import {autorun, observable} from 'mobx';

export default class HomeComponent extends Component{
  constructor(props) {
    super(props);

    this.state = {
      count: 0
    };

    this.store = observable({
      count: 0
    });

    this.increase = this.increase.bind(this);
    this.decrease = this.decrease.bind(this);
  }
}
We import the observable method from the mobx library and use it in our constructor to create a store property.
This constructor also has a state property and the increase and decrease methods that we will use to change the store's count property.
The autorun method is also imported from the mobx library and we use it in the componentDidMount hook:
componentDidMount() {
    autorun(() => {
      this.setState({count: this.store.count})
    });
  }
The autorun method will be triggered every time the store is changed.
We pass a method that will update the React Component state's count property with the updated store's count value.
The last piece of code of the React component:
  decrease () {
    this.store.count--;
  }

  increase () {
    this.store.count++;
  }

  render() {
    return(
      <div>
        <ion-button onClick={this.increase}>
          Increase
        </ion-button>

        <ion-button onClick={this.decrease}>
          Decrease
        </ion-button>

        {this.state.count}
      </div>
    );
  }
The decrease and increase methods will update the MobX store's count value which will trigger the update of the React Component's state in the autorun method.
The render method shows two <ion-button> to trigger the increase and decrease methods from the React Component.
Finally the state's count property is shown.
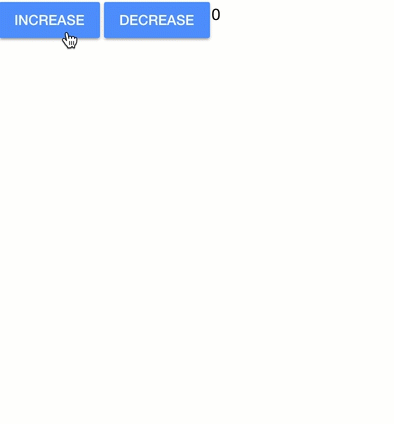
And voila!
Our Ionic React MobX state managed app is working:
Anotations
As stated at the beginning of this tutorial, MobX comes with a set of annotations (and a configuration fee) that can help us.
Let's see how they work.
We will first update the main.jsx file:
import React, { Component } from "react";
import ReactDOM from "react-dom";
import HomeObserverComponent from "./app/HomeObserverComponent.jsx";

ReactDOM.render(
    <HomeObserverComponent />
  , document.getElementById("root")
);
We now need a new HomeObserverComponent React Component which starts like this:
import React, {Component} from 'react';

import { observable, action } from 'mobx';
import { observer } from "mobx-react";

@observer class HomeObserverComponent extends Component{
  @observable count = 0;

  constructor() {
    super();

    this.increase = this.increase.bind(this);
    this.decrease = this.decrease.bind(this);
  }
}
The @observable and @observer annotations are imported. The observer one is used on the Class and the observable one directly on the class count property. This mechanism is possible because we previously configured the @babel/plugin-proposal-decorators and the @babel/plugin-proposal-class-properties plugins.
The increase and decrease methods are tagged with the action annotation:
  @action.bound
  decrease () {
    this.count--;
  }

  @action.bound
  increase () {
    this.count++;
  }
By using the bound property, we attach the method to the object giving us access to the correct context (this).
Finishing with the render method:
  render() {
    return(
      <div>
        <ion-button onClick={this.increase}>
          Increase
        </ion-button>

        <ion-button onClick={this.decrease}>
          Decrease
        </ion-button>

        {this.count}
      </div>
    );
  }
Unlike before, we directly target the count property.
Our application should now be up and running.
Conclusion
Using a state management library is quite useful, we can track the changes happening in the store and also easily implement cool complex features like time travel.
MobX is a very simple one that can be used out of the box with the autorun method or after some configurations with annotations.
The autorun method is simpler to understand and easier to access, however, it's a little bit dirty. The annotation one is cleaner allowing us to declare the properties in the class that we want to track and the actions that will modify those properties.