


Implementing Native Google Maps in an Ionic Application
Google Maps is the king when it comes to Geolocation and Mapping.
Many companies like Uber or Lyft are using Google's technology to rapidly kickstart awesome applications.
In this tutorial we will see how we can quickly create our own application with Ionic's Google Maps Native plugin.
We will create a restaurant mapping application, the user will be able to look for specific restaurants we will place on our map and view in a separate Page what the restaurant offers.
Our plan here is to:
- Display a map with a marker that represents the restaurant
- Load multiple markers on this map
- Handle events on those markers
- Transition to another area that contains a restaurant's information
Before diving into the code, some setups are required.
The Google Developer Console
An account for the Google Developer Console is required, you can get one for free there.
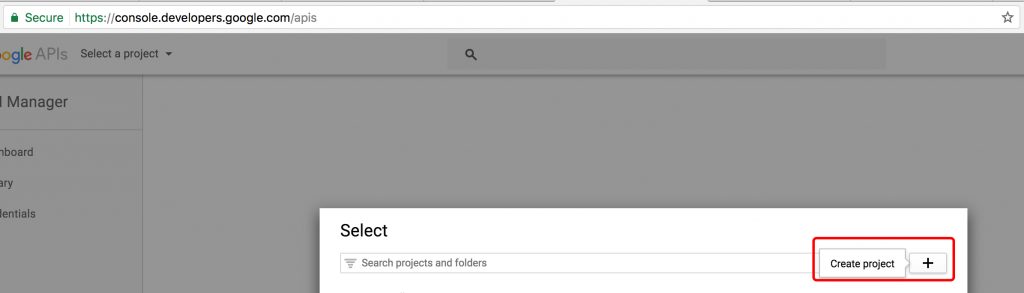
Create a new project:
Once this is done, the Google Maps API is required in the Library menu:

Choose what you need: iOS or Android.
And enable the service:

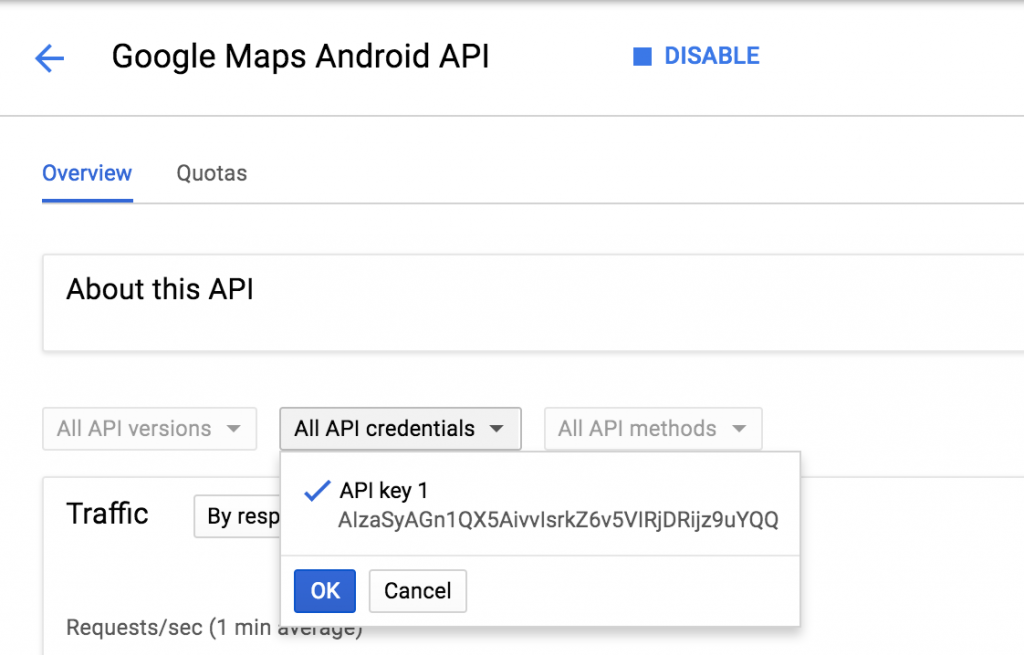
Finally copy the API's key:
We can now get our hands dirty!
One Map, One Marker
Starting with installations:
ionic start ionic-restaurant-map blank
ionic cordova plugin add cordova-plugin-googlemaps
 --variable API_KEY_FOR_ANDROID="GOOGLE_MAPS_KEY_HERE"
 --variable API_KEY_FOR_IOS="GOOGLE_MAPS_KEY_HERE"
npm install --save @ionic-native/google-maps
Nothing new here, just a new project with the Cordova and Ionic plugins using the Google Maps API key we created above.
The home.html file is our starting point:
<ion-content>
  <div #map style="height:100%;"></div>
</ion-content>
This div will contain our map area, it occupies the whole <ion-content> area and the reference #map will be used to grab this Element later.
A detour to the app.module.ts file to add the Native GoogleMaps Service:
import { GoogleMaps } from '@ionic-native/google-maps';
.
.
.
  providers: [
    StatusBar,
    SplashScreen,
    {provide: ErrorHandler, useClass: IonicErrorHandler},
    GoogleMaps
  ]
And the imports in the home.ts file:
import { Component, ViewChild } from "@angular/core";

import {
  GoogleMaps,
  GoogleMap,
  GoogleMapsEvent,
  LatLng,
  MarkerOptions,
  Marker
} from "@ionic-native/google-maps";

import { Platform, NavController } from "ionic-angular";
All of those imports are important.
ViewChild will allow us to grab the map Element from the DOM and the other ones from the @ionic-native/google-maps package will be used to create the map, positions, marker, etc.
export class HomePage {
  @ViewChild('map') element;

  constructor(public googleMaps: GoogleMaps, public plt: Platform,
              public nav: NavController) {
  }
  .
  .
  .
}
Using ViewChild we grab the Element referenced as map from the DOM and stock it in a property named element.
We can now get down to business:
  ngAfterViewInit() {
    this.plt.ready().then(() => {
      this.initMap();
    });
  }
To be sure that everything is loaded, the work is done in the ngAfterViewInit hook and once the platform is ready.
When all the lights are green, the following initMap method is triggered:
  initMap() {

    let map: GoogleMap = this.googleMaps.create(this.element.nativeElement);

    map.one(GoogleMapsEvent.MAP_READY).then((data: any) => {

      let coordinates: LatLng = new LatLng(33.6396965, -84.4304574);

      let position = {
        target: coordinates,
        zoom: 17
      };

      map.animateCamera(position);

      let markerOptions: MarkerOptions = {
        position: coordinates,
        icon: "assets/images/icons8-Marker-64.png",
        title: 'Our first POI'
      };

      const marker = map.addMarker(markerOptions)
        .then((marker: Marker) => {
          marker.showInfoWindow();
      });
    })
  }
We first create a new GoogleMap object by passing our map element to GoogleMaps' create method.
Many tutorials skip the following part, which is very important.
We need to wait for the MAP_READY event to be triggered before doing anything, the one method will listen once for this event. On iOS this is not important, however, on Android forgetting this part can create some issues with the camera's movements or markers creation.
Some coordinates are then created, I chose those ones because it's an airport that has some Google Maps indoor plans and they look really nice! If you want to use your own Geolocation, you can have a look at this Ionic geolocation tutorial.
The camera must be moved to those coordinates otherwise we won't see anything. This is done by using the animateCamera method which is kinda cool 😉.
The markerOptions requires a position and a title, the icon attribute is optional, you can use the default icon, but I'd rather go with a custom one.
Finally, using the markerOptions, a marker is created and the info bubble is shown.
If you have a black or white screen showing instead of the map, you might have to add this in the app.scss file:
ion-app .nav-decor {
  background-color: transparent !important;
}
Here is the first result:
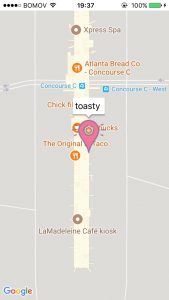
Great, we just mastered how to integrate GoogleMaps and add a marker.
Let's add more markers.
Multiple Markers
The markers data are available in an Amazon Web Service, you can use mine or you can go there to learn how to create a custom Amazon API.
We will need HttpModule to fetch the data so back to the app.module.ts file:
import { HttpModule } from '@angular/http';
.
.
.

@NgModule({
  .
  .
  .
  imports: [
    BrowserModule,
    HttpModule,
    IonicModule.forRoot(MyApp)
  ]
});
And back to the home.ts:
import { Http } from '@angular/http';
import 'rxjs/add/operator/map';
.
.
.

  ngAfterViewInit() {
    this.plt.ready().then(() => {
      this.http.get('https://oghuxxw1e6.execute-api.us-east-1.amazonaws.com/dev')
      .map(res => res.json())
      .subscribe(restaurants => this.initMap(restaurants));
    });
  }
The API is called to acquire the restaurants data, once the data are received, the initMap method is called.
Some modifications to the method:
  initMap (restaurants) {

    let map: GoogleMap = this.googleMaps.create(this.element.nativeElement);

    map.one(GoogleMapsEvent.MAP_READY).then((data: any) => {

      let cameraCoordinates: LatLng = new LatLng(restaurants[0].position.lat,
                                                 restaurants[0].position.lgn);

      let cameraPosition = {
        target: cameraCoordinates,
        zoom: 17
      };

      map.animateCamera(cameraPosition);

      restaurants.forEach((restaurant) => {

        let coordinates: LatLng = new LatLng(restaurant.position.lat,
                                             restaurant.position.lgn);

        let markerOptions: MarkerOptions = {
          position: coordinates,
          icon: "assets/images/icons8-Marker-64.png",
          title: restaurant.title
        };

        const marker = map.addMarker(markerOptions)
          .then((marker: Marker) => {
            marker.showInfoWindow();
          });

      });
    })
  }
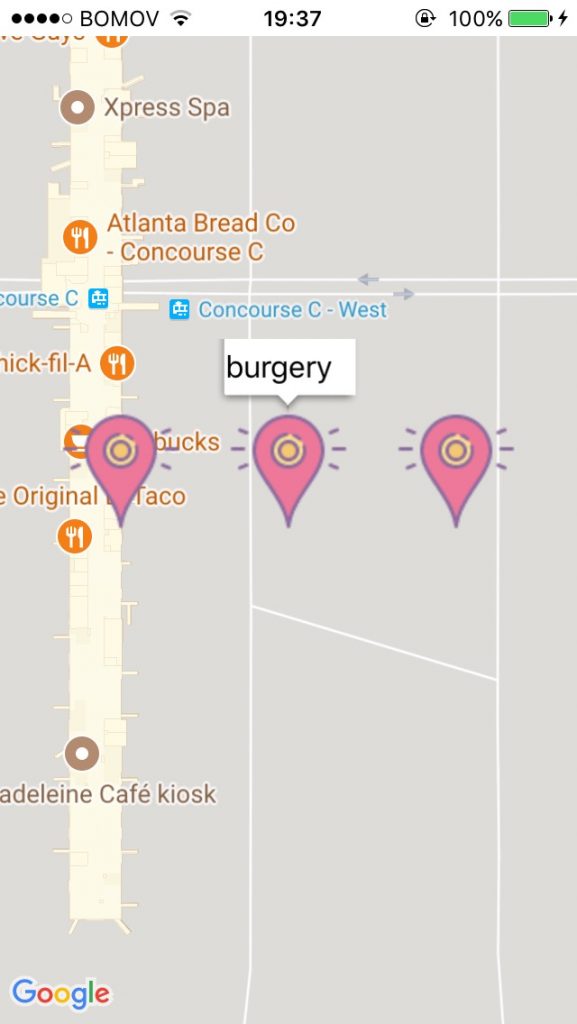
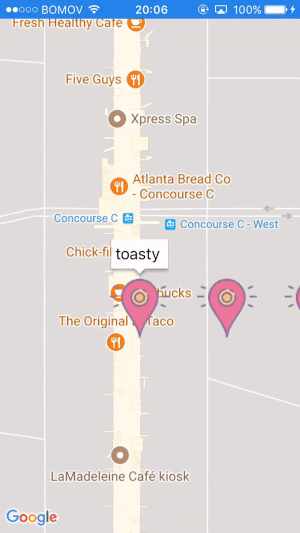
The camera’s position is set to the first restaurant’s position. After that, we loop on the restaurants to create multiple markers, each restaurant has its own position and title properties.
Now we have multiple markers!
Moving to the last part of the application: the restaurant’s details.
All the information can be displayed in one new RestaurantPage.
The restaurant.html file is very simple:
<ion-header>
  <ion-navbar>
    <ion-title text-center>Selected restaurant</ion-title>
  </ion-navbar>
</ion-header>

<ion-content text-center>

  <img src="assets/images/under-construction.jpg">
  <p> Hello this restaurant is under construction at the moment, come back later!</p>

</ion-content>
For now we only display an “under construction” image and some text to inform the user that the restaurant is not yet opened.
Going back to the initMap method, this restaurant view will be shown once the user taps on the info bubble:
import { RestaurantPage } from '../restaurant/restaurant';
.
.
.
  initMap (restaurants) {
    .
    .
    .
      // create new marker
      let markerOptions: MarkerOptions = {
        position: coordinates,
        title: restaurant.title ,
        infoClick: () => {
          this.nav.push(RestaurantPage);
        }
      };
  }
The markerOptions variable is modified, a new infoClick callback is added to move the user to another page.
And Voila!
Conclusion
Adding Google Maps to an Ionic application is fairly easy.
There are some pitfalls to avoid, the most important one is: waiting for the device and the map to be ready. Another one is the background transparency.
Once you have those rules in the back of the head, you can create the area in the HTML file where the map will be shown, grab it, create the map there, move the camera to the good Geolocation and position the markers.
From here the sky is the limit, you can add more interactions with the markers, change the icons to represent a car, make them move and so much more!