


The Ionic CLI
Time for some commands!
Some (useful) commands disappeared from the previous CLI (they might come back later), which make the new ionic-cli more concise.
Ionic commands have different levels.
They can be separated in three categories:
- Local: Everything located on our computer
- Cloud: Everything related to the Ionic Cloud
- Cordova: Everything related to simulation, building and pushing to real devices
Local
The most useful command is:
ionic --help
or for one specific command:
ionic <command> --help
The help will depend of the installed Ionic libraries. If the Cordova extension is locally installed, it will display more information.
Two scopes exist: global and local.
We have already seen this global command:
ionic info
And this one:
ionic start [<name>] [<template>] --help
The start command comes with many options, the most used are:
- type: Whether you want an Ionic 1 or Ionic 3 project
- list: List the available starter applications
- cordova: If you already want to test your application on a device or a simulator
At the end, you will be asked if you want to link the app to the Ionic Dashboard (aka Cloud), we will talk about that at the end.
Once the application is created, we have access to local commands.
One controversial command is the generate command.
This command generates code for the application, you can create Providers, Pipes, Tabs, etc.
It used to accept the --componentsDir, --pipesDir options which allowed us to specify where the code should be generated.
This forces us to adopt a folders-by-type architecture.
This in my opinion is a huge loss.
Following John Papa's guidelines:
You can see how I structure my projects in my book.
Followed by the most used command:
ionic serve
Many options are available, the most useful are:
- lab: Display how the application looks like on the three main platforms (iOS, Android, Windows Phone)
- port: Select the local port to use
- address: Select the local address to use
Moving on to Cordova.
Cordova
Our bread and butter.
Very simple there, it starts with adding the platform:
ionic cordova platform add <ios|android>
The most useful commands allow us to:
build everything for a specific device:
ionic cordova build <android|ios>build everything for a specific device and run it on a real device:
ionic cordova run <android|ios>build and run it on a simulator:
ionic cordova emulate <ios|android>install Native plugins to get access to Native Components (here the camera):
cordova plugin add cordova-plugin-cameragenerate the icons and splash images for a device by using the icon.png and splash.png located in the resources folder:
ionic cordova resources <nothing|ios|android>
Moving on to the final part, which is optional.
The Ionic Dashboard
The Ionic Cloud, a place where applications live happily ever after.
You don't want to build a server for authentication? You only have Windows and can't test your iOS app?
The Ionic Cloud comes to the rescue.
If you don't need extra services and you do everything in-house, you won't need those features.
It all starts with creating an account there.
Allowing us to login with this newly created account:
ionic login
Next step linking the application:
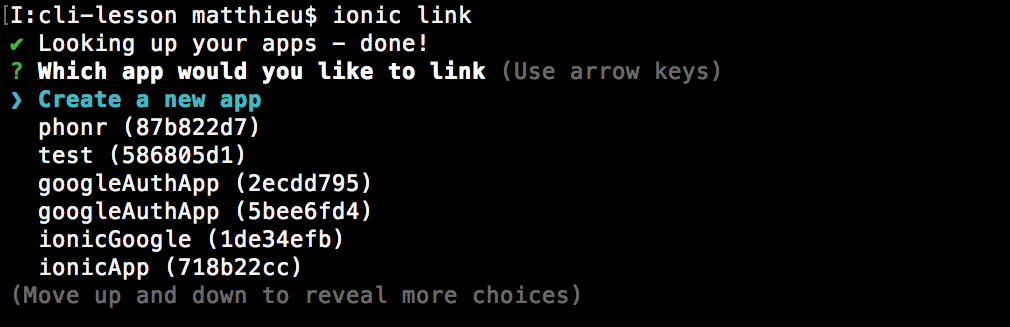
Once this is done, we can use the ionic package commands.
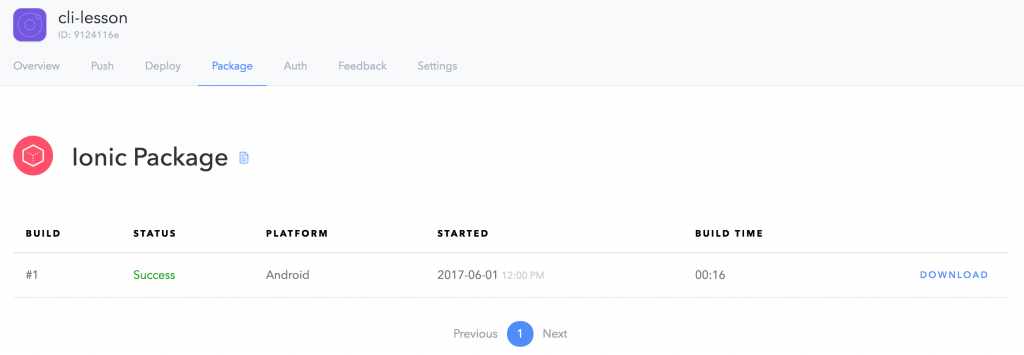
Starting with the build action:

And Voila it's in the Cloud!
The other package commands are self-explanatory: download, info and list.
Conclusion
The Ionic Team has done an awesome work with their CLI.
Everything is separated into pieces and the link with the Cloud is natural.
If we don’t need a feature, the help interface will not be polluted with useless informations (aka noise).
We can also only use the serve command until we are ready to test our work on a real device or a simulator using Cordova, if we need more features we can create an application in the Cloud and profit!
However, this last part can be a double edged sword. Remember Google Reader? Such a nice RSS feed aggregator that many people used. A company can stop a service if it isn’t economically viable, so can Ionic.