


Injecting Objects in an Augmented Reality Ionic App using Wikitude
Injecting objects into our world (or vice-versa) is the main goal of Augmented Reality. Those elements can be of different types. Images, videos, sounds, whatever media you want.
Let's see how we can do this in Ionic using a Wikitude file.
This tutorial is the continuation of this one. Head there to see what Wikitude offers.
This time we are going to create everything from Zero.
The earth model is available here and the indicator image there.
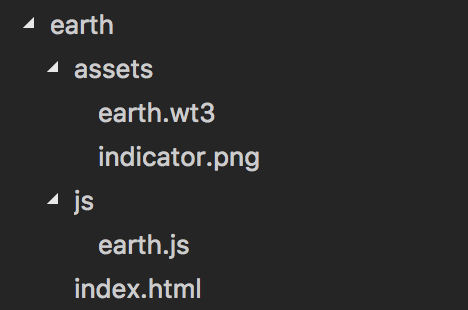
Our world folder will be as follow:
First we move the world launching logic in a new method:
  launchWorld() {
    this.wikitudePlugin.loadARchitectWorld(
      this.onARExperienceLoadedSuccessful,
      this.onARExperienceLoadError,
      this.arExperienceUrl,
      this.requiredFeatures,
      this.startupConfiguration
    );
  }
Once this is done, we can add another launching method for our experiment that will use this launchWorld method:
  launchEarth() {
    this.arExperienceUrl = "www/assets/experience/world/earth/index.html";
    this.launchWorld();
  }
We only change here the file that will be loaded.
onDeviceSupported = () => {
  console.log("device supported");
  this.launchEarth();
};
The index.html file that will be used is as follow:
<!DOCTYPE html PUBLIC "-//W3C//DTD HTML 4.01 Transitional//EN"
                      "http://www.w3.org/TR/html4/loose.dtd">
<html>
<head>
<meta http-equiv="Content-Type" content="text/html; charset=ISO-8859-1">
<title>My ARchitect World</title>

<!-- Important: Let the viewport cover the whole screen -->
<!-- NOT ALLOWED: , target-densityDpi=device-dpi -->
<meta name="viewport" content="width=device-width, minimum-scale=1.0,
                               initial-scale=1, maximum-scale=1.0, user-scalable=no" />

<!-- Include the ARchitect library -->
<script src="https://www.wikitude.com/libs/architect.js"></script>
<script src="../ade.js"></script>

</head>

<body>
  <script src="js/earth-world.js"></script>
</body>

</html>
Very basic here, the important imports here are the architect and ade libraries. Those libraries are necessary because they contain the main methods we will use to launch our world.
A World file contains a World Object:
var World = {
  init: function initFn() {
    var location = new AR.RelativeLocation(null, 5, 0, 2);
  }
};
This init method will start everything, for now it only contains a geolocation.
This geolocation is relative to another location or the user's location.
By setting the first parameter to null, the location will be relative to the current user, precisely 5 meters north and 2 meters above.
Still in this init method:
var modelEarth = new AR.Model("assets/earth.wt3", {
  scale: {
    x: 1,
    y: 1,
    z: 1
  }
});
The AR variable comes from the ade.js file, it contains the methods we need to create our objects.
Here we ask for a new 3D Model by passing the path of a wt3 file.
You can change the scale if you want to make this model bigger or smaller.
An Indicator can be added to help the user find the model (especially if you are not sure if the model is correctly loaded):
var indicatorImage = new AR.ImageResource("assets/indicator.png");

var indicatorDrawable = new AR.ImageDrawable(indicatorImage, 0.1, {
  verticalAnchor: AR.CONST.VERTICAL_ANCHOR.TOP
});
The first step is to create an ImageRessource, this can be a jpeg, jpg, png, etc.
This image will then be converted into a visual representation of an ARObject.
The ARObject is the most basic Object in AR, it's the equivalent of Object in JavaScript.
The indicator image is quite big so we scale it down to one tenth.
Finally, setting up the verticalAnchor value to top by using a constant from the library.
This makes the indicator totally visible instead of half-cut by the screen.
We have our indicator and our 3D Model.
All we need now is to set them together on the screen:
var obj = new AR.GeoObject(location, {
  drawables: {
    cam: [modelEarth],
    indicator: [indicatorDrawable]
  }
});
Using the previous generated location, the indicator will be coupled with the earthModel and a GeoObject will be created.
Finally we can launch our app:

Conclusion
Creating objects with Wikitude is fairly easy, in our case we used a relative position, however, we can place objects at specific absolute positions.
It's better to add an indicator so the user can quickly locate where the object is positioned.
Every objects can be proportioned in order to give the user a better experience, in our case we only had one object, however, when many objects are displayed on screen, it can quickly become chaotic.