


Implementing GraphQL using Apollo in an Ionic Application: Introduction
7 years ago I had to do a school project on REST or SOAP. I followed my instinct and chose REST.
Today I'm taking a step forward with GraphQL.
Just like Redux, this technology is trending via Facebook's React and we can now use it in our Ionic applications.
As usual, the aim when learning a new technology is becoming more productive by doing more or putting less effort.
GraphQL is a new way to interact with a server.
With REST we are used to calling a specific url in order to get some data, however, we are dependent of the server's implementation.
I used to work with remote teams. If the backend dev forgets to add one field to a response, the only solution is quite inconvenient:
- I open a ticket
- Wait 8 hours until he wakes up
- Then he creates a new branch and push it on the test environment
- I change my config to point to this test server
- He creates a pull request
- It's reviewed X hours later
- Then it's merged to the dev server
- I change back my config to point to the dev server
With GraphQL this is how it's done.
Before:
query users {
  users {
    id
  }
}
After:
query users {
  users {
    id
    name
  }
}
That's it!
All I have to do is adding one word and I have my missing field, and that's just the tip of the iceberg.
In this tutorial we take our first steps mixing together GraphQL, Apollo, NodeJS and Ionic.
Server Side
Setting up a basic GraphQL Server is similar to setting up Mongo.
We just need Schemas and Methods.
We first create the Ionic project:
ionic start ionic-graphql-intro blank
j In the Ionic root folder we can add some new items:
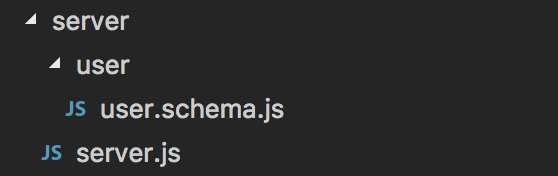
The server.js file will just use the user.schema.js file to create a GraphQL server.
We will need NodeJS for running the server.
Alongside those libraries:
npm i --save express express-graphql graphql cors
Our aim is to retrieve some users from the server side.
Here is the server.js file:
var userSchema = require("./user/user.schema").userSchema;

const express = require("express");
const graphqlHTTP = require("express-graphql");
var cors = require("cors");

const app = express();
app.use("*", cors());

app.use(
  "/graphql",
  cors(),
  graphqlHTTP({
    schema: userSchema,
    graphiql: true
  })
);

app.listen(4000);
Most of the GraphQL's logic is located in the user.schema.js file.
All we do here is starting a new Express server which supports CORS.
GraphQL Client will emit requests to the "/graphql" route. GraphQLHTTP will handle those requests and answer using the userSchema.
graphiql (Graphical) will become one of our best friends. This will allow us to test our requests in the browser instead of using a tool like Curl.
Ok we are listening on the port 4000 and are ready to dive in the user.schema.js file:
var GraphQLObjectType = require("graphql").GraphQLObjectType;
var GraphQLSchema = require("graphql").GraphQLSchema;
var GraphQLFloat = require("graphql").GraphQLFloat;
var GraphQLString = require("graphql").GraphQLString;
var GraphQLList = require("graphql").GraphQLList;

var USERs = [
  {
    id: 1446412739542,
    name: "Matthieu"
  },
  {
    id: 1446412740883,
    name: "Jean"
  }
];
The beginning is quite simple. We start by acquiring the GraphQL types (int, float, etc.).
We can use whatever we want for storing the data (Mongo, MySQL, Redis), but that's not the point of this tutorial. We are just going to use an array of users named USERs, nothing complicated.
Our type of data must be declared:
var UserType = new GraphQLObjectType({
  name: "user",
  fields: function() {
    return {
      id: {
        type: GraphQLFloat
      },
      name: {
        type: GraphQLString
      }
    };
  }
});
The UserType is created, its fields are:
- id represented by a float
- name represented by a string
To read the user information we will use a GraphQL Query:
var queryType = new GraphQLObjectType({
  name: "Query",
  fields: function() {
    return {
      users: {
        type: new GraphQLList(UserType),
        resolve: function() {
          return USERs;
        }
      }
    };
  }
});
This query will return an object that will contain a users field. This users field is an array of users. In the GraphQL language this array is a GraphQLList of UserType.
The resolve field here is where the logic is done. We are going to return the USERs array. This is where the magic happens.
We don't need to specify which field are returned (id, name, etc.). GraphQL will take this array into account, look at the query and return the fields that are asked by the client.
Finally we can export the schema:
exports.userSchema = new GraphQLSchema({
  query: queryType
});
I'm using the nodemon plugin to launch the server, it's a great plugin for reloading the server on changes:
nodemon server.js
We can now open the browser and go to:
We can go there and type our first query:
query users {
  users {
    id
    name
  }
}
Here is the result:

It's easier to debug GraphQL from this place. This is the equivalent of PHPMyAdmin. Everything should work there before moving to the client and making the changes.
If the query is working here, we can move to the client side.
Client Side
Our aim here is to acquire our users by using a GraphQL query.
Apollo is the library that will help us achieve this goal.
Let's install some plugins:
npm i --save apollo-angular apollo-client graphql-tag
apollo-angular and apollo-client are the core libraries. The graphql-tag will transform our query string into a query document.
Let’s start with a quickfix.
If you encounter the following error:
You just need to add “esnext” in the tsconfig.json file, like this:
"lib": [
      "esnext",
      "dom",
      "es2015"
    ]
We can now go to the home.html file:
<ion-header>
  <ion-navbar>
    <ion-title>
      Ionic GraphQL Intro
    </ion-title>
  </ion-navbar>
</ion-header>

<ion-content padding>
  <ion-list>

    <ion-item *ngFor="let user of data | async | select:'users'">
      {{ user.name }}
    </ion-item>

  </ion-list>
</ion-content>
As usual, we use ngFor to loop on our data.
This time the async and select Pipes are used because we will go through an Observable and look for the users field of the data property.
Each user’s name will be displayed here.
Remember, we are not using REST anymore. However, we need to communicate with the server.
A setup phase is required in the app.module.ts file:
...
import { ApolloModule } from 'apollo-angular';

import { ApolloClient, createNetworkInterface } from 'apollo-client';

const client = new ApolloClient({
  networkInterface: createNetworkInterface({
    uri: '//localhost:4000/graphql'
  }),
});

export function provideClient(): ApolloClient {
  return client;
}
The ApolloModule is the core Angular Module, we will use it later on.
We create a new Apollo Client by setting up a new network Interface pointing to our GraphQL Server.
Finally we add a provideClient function.
Everything is used in the import field:
...
@NgModule({
  ...
  imports: [
    ...
    ApolloModule.forRoot(provideClient)
  ],
});
Apollo’s GraphQL and tools are ready to be used in our Ionic application.
The approach in the home.ts file is similar to the one we had in GraphiQL:
import { Component } from '@angular/core';
import { Apollo, ApolloQueryObservable } from 'apollo-angular';
import gql from 'graphql-tag';

const Users = gql`
  query {
    users{
      id
      name
    }
  }
`;
...
Using the grapqhl-tag library we create the same query we previously used.
export class HomePage {
  data: ApolloQueryObservable<any>;

  constructor(private apollo: Apollo) {
  }

  ngOnInit() {
    this.data = this.apollo.watchQuery({ query: Users });
  }
}
Apollo is imported then injected.
The data property will be an ApolloQueryObservable. In the ngOnInit hook we will make and watch our query, an Observable will be returned and stocked in the data property.
And voila!
We have our information pulled from the server:

Conclusion
Moving from REST to GraphQL is quite a pivot.
GraphQL allows us to work without depending on the server side. I have heard many times at daily stand ups: “Well … just mock up what you need until the backend add the data”.
All we need is Apollo on the client side and GraphQL on the server side, no need for the HTTPModule or sending HTTP requests.
Everything is handled by Apollo, we just subscribe and profit.