


Creating a TODO application using Stencil
Stencil arrived some months ago as the web revolution.
Even for Ionic experts, the transition to this technology can seem quite complicated. At the moment and until Ionic 4 is out, Stencil's full potential is not yet known. It's fast and it works everywhere, that's all we know.
In this tutorial, we will use Stencil to create a TODO application.Even if you have already mastered Ionic and Angular, Stencil might be quite a change.
Ionic 4 will grab your Angular/ React / Vue code and generate Stencil code. As I predicted two years ago for Angular 2, most of the documentation and code today is written in TypeScript. This is due to Google and Microsoft pushing this technology. I will make the same prediction and assume that next year, once Ionic will be framework-agnostic, React and Vue developers will come in and Stencil code will be dominent.
That's why we can't only focus on learning Angular for Ionic.
The TODO application that we will create will showcase most of Stencil's current toolbox:
- Usage of Props, States
- Communication between a TodoList and Todo Component through an EventEmitter
- Template bindings, if, for
- HTML events like onChange, onClick, onDblClick
- Using a child Component
So, take your time to understand each part and you will be Stencil-ready!
We start by cloning the Stencil app starter project and install the deps:
git clone https://github.com/ionic-team/stencil-app-starter stencil-todo-app
npm i
npm start
At the moment, there are no Stencil CLI. However, we can expect one to come soon.
Let's start with some clean up.
Clean up
A MyName Component is already there, but we don't want this:
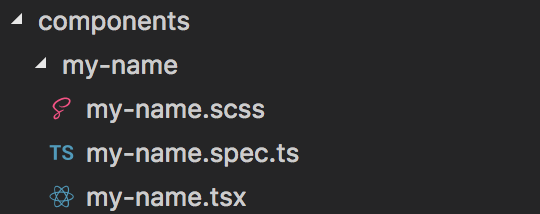
Or this:
@Component({
  tag: 'my-name',
  styleUrl: 'my-name.scss'
})
export class MyName {
  ...
}
The whole components are bootstrapped in the components.d.ts file:
/**
 * This is an autogenerated file created by the Stencil build process.
 * It contains typing information for all components that
 *  exist in this project
 * and imports for stencil collections that
 *  might be configured in your stencil.config.js file
 */

import '@stencil/router';

import { MyName as MyName } from './components/my-name/my-name';

interface HTMLMyNameElement extends MyName, HTMLElement {
}
declare var HTMLMyNameElement: {
  prototype: HTMLMyNameElement;
  new (): HTMLMyNameElement;
};
declare global {
  interface HTMLElementTagNameMap {
      "my-name": HTMLMyNameElement;
  }
  interface ElementTagNameMap {
      "my-name": HTMLMyNameElement;
  }
  namespace JSX {
      interface IntrinsicElements {
          "my-name": JSXElements.MyNameAttributes;
      }
  }
  namespace JSXElements {
      export interface MyNameAttributes extends HTMLAttributes {

          first?: any,
          last?: any
      }
  }
}
This is quite similar to an Ionic or Angular app.module.ts file.
Let's start by changing the files names:
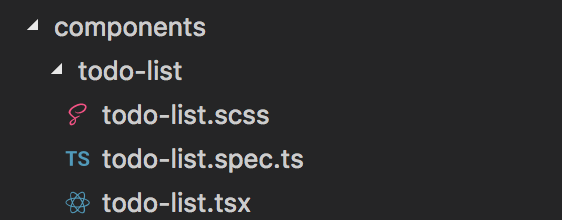
And the Component:
import { Component, Prop } from '@stencil/core';

@Component({
  tag: 'todo-list',
  styleUrl: 'todo-list.scss'
})
export class TodoList {
 ...
}
The build process will detect the changes and automatically update the component.d.ts file for us, which is really awesome (would love to get the same for Angular and Ionic).
/**
 * This is an autogenerated file created by the Stencil build process.
 * It contains typing information for all components that exist in this project
 * and imports for stencil collections that might be configured in
 *  your stencil.config.js file
 */

import '@stencil/router';

import { TodoList as TodoList } from './components/todo-list/todo-list';

interface HTMLTodoListElement extends TodoList, HTMLElement {
}
declare var HTMLTodoListElement: {
  prototype: HTMLTodoListElement;
  new (): HTMLTodoListElement;
};
declare global {
  interface HTMLElementTagNameMap {
      "todo-list": HTMLTodoListElement;
  }
  interface ElementTagNameMap {
      "todo-list": HTMLTodoListElement;
  }
  namespace JSX {
      interface IntrinsicElements {
          "todo-list": JSXElements.TodoListAttributes;
      }
  }
  namespace JSXElements {
      export interface TodoListAttributes extends HTMLAttributes {
          mode?: string,
          color?: string,

          first?: string,
          last?: string
      }
  }
}
The last modification is located in the stencil.config.js file:
exports.config = {
  bundles: [{ components: ["todo-list"] }],
  collections: [{ name: "@stencil/router" }]
};
The TodoList Component
We can finally get to work, starting with the todo-list.tsx file:
import { Component, State, Listen } from '@stencil/core';

@Component({
  tag: 'todo-list',
  styleUrl: 'todo-list.scss'
})
export class TodoList {
  @State() todos: any;
  @State() newTodo;

  componentWillLoad() {
    this.todos = [{ id: 1, value: 2 }];
  }
  ...
}
We grab all the Decorators we will need:
- Component: To create a Component
- State: To create a property, it's similar to an Ionic or Angular Class property
- Listen: That will later allow us to acquire events from a Todo child Component
The todos State is created with information for one Todo Component.
Our TodoList Component will create some Todo that will contact it when some changes will happen, like this:
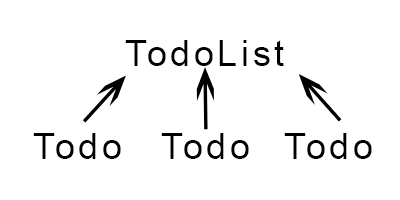
This todos State is instantiated in the componentWillLoad Hook, just like Angular and Ionic, Stencil has Hooks, they are documented on the official website.
If we make the comparison with Ionic or Angular, the TodoList Component needs a template. We are using TSX, the HTML information will be created in a render method:
  render() {
    return (
      <div>
        <input onChange={e => this.updateNewTodo(e.target)}/>

        <ul>
          {this.todos.map((todo) => {
            return <my-todo
              value={todo.value}
              id={todo.id}></my-todo>
          })}
        </ul>
      </div>
    );
  }
TSX allows us to mix HTML and JavaScript together, unlike Angular that has its own ngIf, ngFor tags, here we don't have anything. Everything is done by using JavaScript. If you come from React, that shouldn't be surprising, if not ... well it's awkward and also a good thing. It can be weird mixing together HTML and JS, a bit like using PHP tags with HTML.
However, we don't waste time:
- Learning the syntax: It will always be JavaScript, there won't be any changes on the whim of the authors
- Going through the documentation trying to understand what the authors wanted to do and how the tag should be used
HTML Components have their own events, all of us already used onClick, onKeyUp, etc.
All of them are listed there.
Let's start with input:
<input onChange={e => this.updateNewTodo(e.target)}/>
The onChange event is used.
Years ago, when I learned Angular, as a beginner it was quite a dilemn choosing between {{}}, "", "{{}}", etc.
With Stencil, the curly brackets ({}) are used when we want an expression to be interpreted and the double quotes ("") are used to pass a string.
onChange will give us an event. We are going to pass this event’s target to the updateNewTodo method.
As you can see, the big fat arrow is used here, this allows us to keep using the same “this” object.
We can also do this:
<input onChange={this.updateNewTodo().bind(this)}/>
However, I’m not a big fan of the bind(this) method (+ we don’t get the event here).
The last part of the template:
        <ul>
          {this.todos.map((todo) => {
            return <my-todo
              value={todo.value}
              id={todo.id}></my-todo>
          })}
        </ul>
By using the map method, we can loop through the todos State. This must be enclosed by brackets.
This syntax can be compared to PHP:
<?php
  echo "Hello world";
?>
The return here is the cousin of echo.
The
The render method is now complete.
We can now add the updateNewTodo method:
  updateNewTodo(newTodo) {
    this.todos = [...this.todos, { id: Date.now(), value: newTodo.value }];
  }
As Stencil’s documentation states:
If we just push the newTodo State in the todos State, Stencil won’t update the template. We have to create a new Array that contains the current todos information and the newTodo information by using the spread operator.
We will now move to the Todo Component, we will finish the TodoList Component later.
The Todo Component
Starting with the imports and initializations:
import { Component, Prop, State } from '@stencil/core';
import { Event, EventEmitter } from '@stencil/core';

@Component({
  tag: 'my-todo',
  styleUrl: 'todo.scss'
})
export class Todo {

  @Event() removeTodo: EventEmitter;
  @Event() updateTodo: EventEmitter;

  @Prop() value: string;
  @Prop() id: string;

  @State() isEditable = false;
  ...
}
Event and Event Emitter will be used to send custom DOM Events, events that the TodoList will be listening for.
Those events will be removeTodo and updateTodo.
value and id are Props, those are information received from the parent Component: TodoList.
We can’t use a State to acquire those information. It’s very important to note that Props can’t be modified by default (passing {mutable: true} to the Prop Decorator can flip the switch). The TodoList will receive the information (by listening for an event) that a todo needs some changes and update its todos State. After this update, the TodoList will re-render and recreate the Todo Components.
Finally, the isEditable State that will act as a toggleable flag impacting the rendered information.
Here is the method that will act on this State:
toggleEdition = () => {
  this.isEditable = !this.isEditable;
};
Let’s tackle the render method:
render() {
    let todoTemplate;

    if (!this.isEditable) {

      todoTemplate = <div>
        {this.value}
        <button onClick = {this.removeThisTodo}>
          X
        </button>
      </div>

    } else {

      todoTemplate = <div>
        <input value={this.value} onKeyDown={this.handleKeyDown} />

      </div>
    }

    return (
      <li onDblClick= {this.toggleEdition}>
        {todoTemplate}
      </li>
    );
  }
The template will change depending of the isEditable State.
If it’s not editable, we will show the Todo’s value and a button to remove the todo.
If it’s editable, we will show an input. This input gets its value from the value Prop.
We will listen for every keys down and trigger an handleKeyDown method.
This template will be stocked in a todoTemplate variable that will be used in the final template.
This final template is a double clickable <li> tag. The toggleEdition method will be toggled by the onDblClick event.
The todoTemplate is finally inserted inside this <li> tag.
The Todo’s changes will go through the handleKeyDown method:
handleKeyDown = e => {
  if (e.code === "Enter") {
    this.updateThisTodo(e.target.value);
    this.isEditable = false;
  }
};
If the ‘Enter’ key is typed, we will pass the input’s value to the updateThisTodo method and set the isEditable State to false.
The events will be emitted by the following methods:
  removeThisTodo = () => {
    this.removeTodo.emit(this.id);
  }

  updateThisTodo(value) {
    this.updateTodo.emit({value: value, id: this.id});
  }
removeThisTodo will emit the Todo’s id and updateThisTodo will emit the input’s value and the Component’s id to update to the TodoList.
The id Prop can be used because it will always stay the same. However, we can’t use the value Prop because it can’t be modified.
We can now go back to the TodoList to receive those events.
TodoList: The final touch
Starting with the easiest method:
  @Listen('removeTodo')
  removeTodo(event) {
    this.todos = this.todos.filter((todo) => {
      return todo.id !== event.detail;
    });
  }
We start listening for the ‘removeTodo’ event by using the Listen Decorator we imported earlier.
When this event is received, the removeTodo method is called.
This method receives an event parameter and we will only use its detail field which contains the todo’s id.
All we need to do is recreate the todos State by filtering the Todo matching the received id.
Our final lines of code:
  @Listen('updateTodo')
  updateValue(event) {
    const todos = this.todos.concat([]);

    let todoToUpdate = todos.filter((todo) => {
      return todo.id === event.detail.id;
    })[0];

    todoToUpdate.value = event.detail.value;

    this.todos = todos;
  }
This time, we listen for the updateTodo event and trigger the updateValue method.
The event.detail contains the todo’s id and its updated value.
The first line allows us to create a new temporary todos array.
We can’t do:
const todos = this.todos;
This won’t create a new array. It will just point to the current todos State. Our goal here is updating the temporary todos array then use it to recreate the todos State in order to re-render the TodoList template and recreate the Todo child Components.
We go through the todos and filter the one matching the id. We update its value and finally recreate the todos State.
And Voila!
We have our Stencil Todo application working:
Conclusion
Stencil is very close to React, we can presume that future features will be very familiar to React devs (Redux?).
For now, we can put on the side Angular‘s tags and focus on learning a whole new technology. However, don’t forget that Ionic will convert its code to Stencil, you can use React, Vue, Angular, it’s not going to be an issue.